Pages

Friday 28 August 2015

Turn a Dress into a Skirt

Being a mum nights out are rarely seen but with one penciled  in on the calendar it was time to start planning what to wear. It has to be a dress or a skirt but you open your wardrobe and you're faced with 'I've worn this one before' and 'Don't feel like wearing that one' 'I wore that last year time'  so whats a girl to do?

Buy a new dress? Buy a new skirt? Hmmmm... As much as I'd love to buy new clothes all the time money doesn't always allow and plus it's much more this way!

A little while ago I bought a black polka dot dress from Asda George, feel in love with the polka dot design and the waffle texture to it, wasn't overly keen on the neckline or sleeves but that set aside it was reduced to £5 so that deemed it a bargain which I had to have!


To turn it into a skirt follow these steps

1. Begin by laying your dress on the floor and mark out the waistline and cut across.


2. Put the top to one side as you'll need that later. Working on the skirt piece, turn it inside out and fold the waistband over a few times. My dress has a high percentage of elastic in it so I don't need to add any but if yours hasn't you'll need to thread some elastic through at this stage too.

 3. Take it to your sewing machine and you want to sew around the top edge and around the bottom edge.


4. On my skirt I added pockets cos I just love a skirt with pockets, they're so handy and I hate looking after a purse on a night out. To make these take the top part of the dress, turn inside out and lay flat. You basically want to cut out four pocket shaped pieces. I cut mine on the fold so I cut two.


5. Position these on the skirt where you'd like the pockets to be. I put them around the hip area. Cut a slit in your skirt the length of the pocket and pin around ready to sew. You're gonna need to do this inside out but make sure the pocket is the right way round. I made my pockets so they are printed inside.


6. Once you've gone around the opening you'll need to sew around the pocket to make the actual pocket.


7. Repeat this again for the other pocket, turn right side out and hey presto!


I added a belt over my waistband to finish it off. I think it looks fab!

C x


Wednesday 26 August 2015

Standard Mitten Free Knitting Pattern

As winter is fast approaching I wanted to start making some mittens again. After a quick internet search you can find loads of knitting patterns for mittens or all various shapes, sizes, designs, colours etc but I want just a simple plain mitten pattern which I can mix up the colours on and also the photos that come with these patterns sometimes do not do the patterns any justice :/

I've written a pattern for a plain mitten with a ribbed cuff that will fit a teenager to an adult, but probably not men, as their hands are typically larger. My hands are fairly average and these fit nicely on me!

Anyway here is the pattern.


Standard Mittens
Sizes
Adult
Materials
2mm and 3¼mm needles.
Double Knitting Yarn
Abbreviations
MC: Main Colour
K2tog: Knit two stitches together at the same time


Mittens
Using MC 2mm needles Cast on 54 sts. I always cast on purl wise as it gives a nicer edge.
1st row: K2, P2 to end
Continue working in rib for 20 more rows.
Change to 3¼ needles.
Next Row: Knit to end
Continue in garter stitch for 38 rows.
Divide for Thumb
Next Row: Knit 20, place next 14 sts onto a stitch holder, knit across remaining 20 sts.
Next Row: Work 48 rows in garter stitch.
Next Row: K2tog, K2, K2tog to end, knit last 2 sts.
Next Row: Knit
Next Row: K2tog to end.
Next Row: Knit.
Next Row: K2tog to end, K1.
Break yarn and thread yarn through sts.

Thumb
Rejoin yarn to the 14 sts on the stitch holder.
Next Row: Increase once, K5, increase twice, k5 increase last st. 18 sts.
Garter Stitch 20 rows.
Next Row: K2tog to end
Break yarn and thread yarn through sts.

Sewing up is pretty easy to work out and you should have a nice glove. For a bigger fit you could knit it on larger needles :))

Here's the mittens I've knitted with this pattern. I adjusted the pattern slightly to make a smaller mitten.


C x

Monday 24 August 2015

Little Bedtime Dolly

Hello,

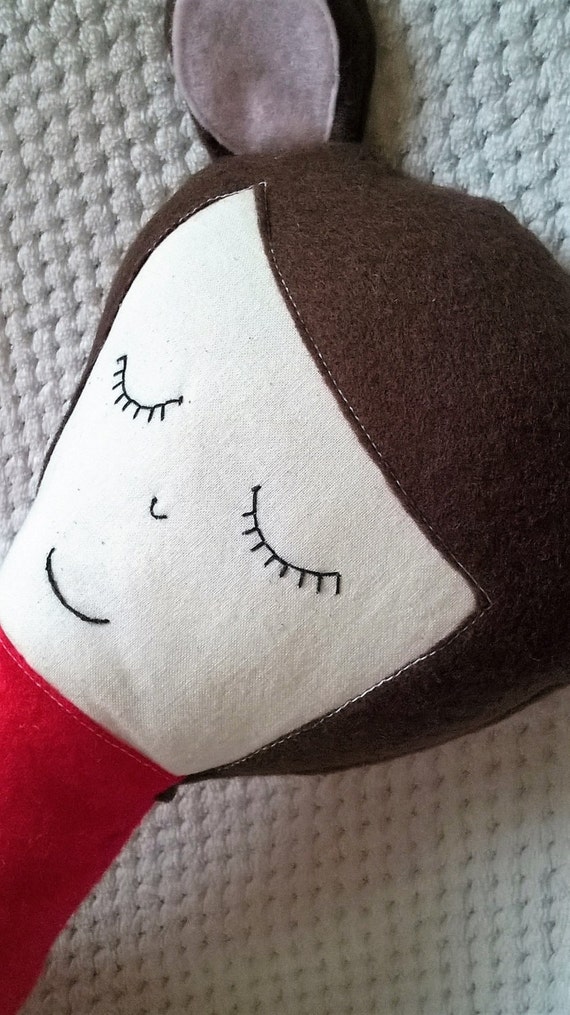
Just wanted to share a really simple quick and easy doll that I've just made. I've called her Little Bedtime Dolly to go nicely alongside my Little Cloth Dollys. I'd seem a few similar to it online and some people are selling the pattern on Etsy but I thought I'd just go for it and cut it out of fabric.

For the face I used the same pattern piece I use for Little Cloth Dolly and the same with the hair, I cut the main hair outline then always freehand the rest so I get different hairstyles all the time. Then for the body I cut 2 egg shaped pieces. If you imagine an egg with the top missing. I cut 1 slightly larger, which was going to be the front piece, the leaves enough spare fabric to gather it as you sew to make it look like a blanket.


I then simply sewed it all together, embroider a face and stuffed it. I think it looks really good and would make a nice gift for a smaller child that wasn't that fussed with dolls clothes.


I've listed her in my Etsy shop for just £10 which I think it a great price. I always like to price my items reasonably and I hope i get it right!

Here is the link

C x